Table of Contents
Introduction
Signing writes an ECDSA signature into the firmware image. The bootloader of a cybersecurity module checks this signature before it starts the application. Applics Studio signs automatically during the build and it can sign existing .s19 files on the S19 Information and Signing page.
Set Keys in Project
- Open the project
Project Datacontains two fields:Signing Key:SW signature private key, e.g.sw_signature_private_key.pemAuthentication Key:Authentication private key, e.g.auth_private_key.pem
- Click the
folder buttonand select the.pemfile
Optionally, paste the full path into the text box - Save the project
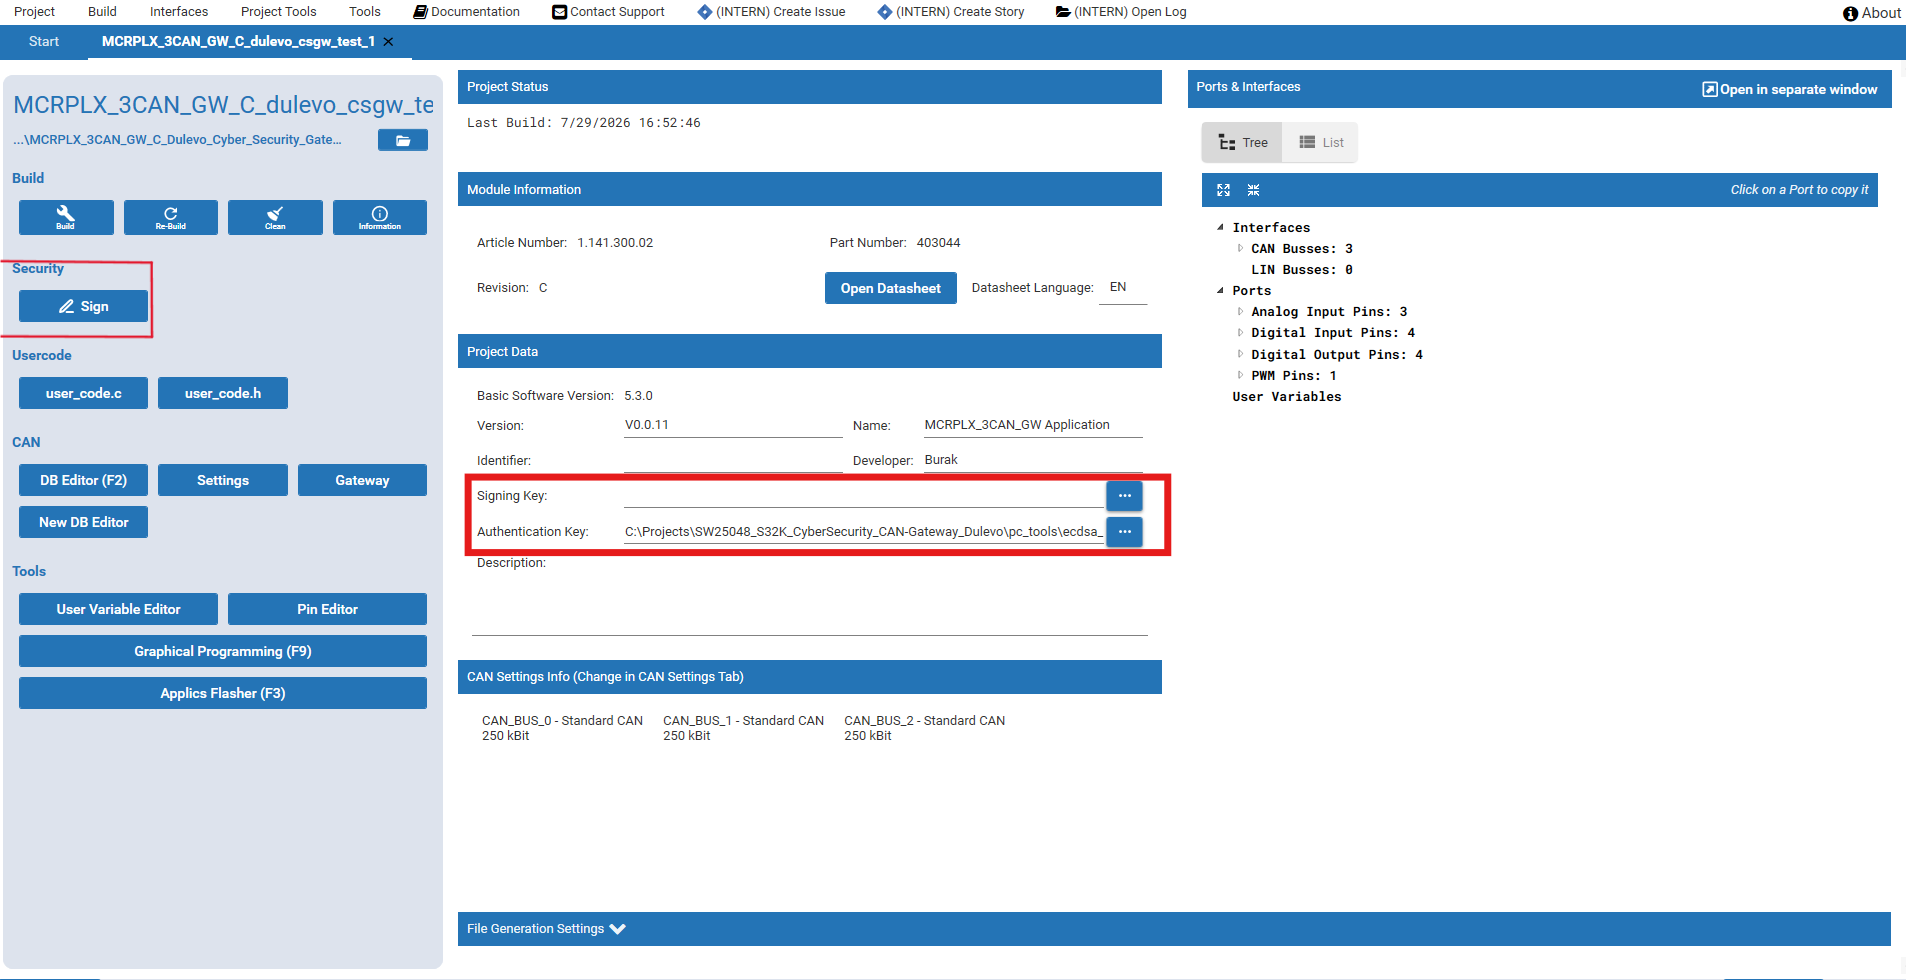
The two fields do not depend on each other, you can also fill only one of them. In the picture above only the authentication key is set, so this project can authenticate a module but the build does not sign the image. Without an authentication key you select the key later in the Flasher.
Both paths are saved within the project. The signing key is used by the build and is already selected on the S19 Information and Signing page. The authentication key is filled into the Flasher automatically, see Authentication.
The Security area in the left side bar offers the Sign button. It opens the S19 Information and Signing page, where you sign .s19 files manually, see Sign a Package Manually.


Use the private key files here. If you select a public key or a certificate, you get the message “Signing key file is not a private key.”. Only the path is saved, not the key itself. If you move the project to another PC, the key files have to be there too and you have to select them again.
Build and Sign
- Press
BuildorRe-Buildon theProjectpage - The build log first writes which key is used
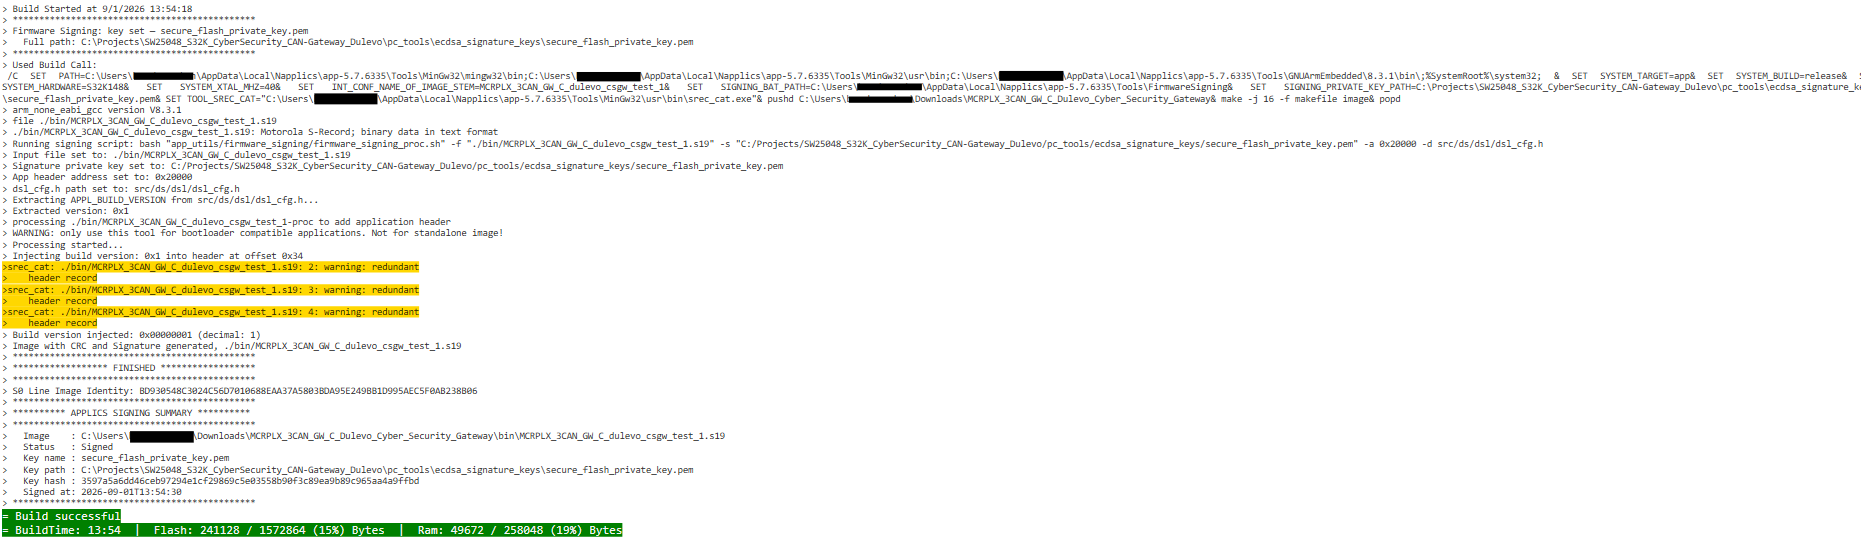
- After compiling and linking, Applics Studio signs the image and writes the signing information into the
.s19 - At the end you see the summary in the build log:
**********************************************
********** APPLICS SIGNING SUMMARY **********
**********************************************
  Image    : C:\...\firmware.s19
  Status   : Signed
  Key name : sw_signature_private_key.pem
  Key path : C:\Projects\...\sw_signature_private_key.pem
  Key hash : 3c5978383f45c1f73a748fdae4990328ceaf0c9c2db2e6bd591559b96f199584
  Signed at: 2026-07-02T13:47:01
**********************************************
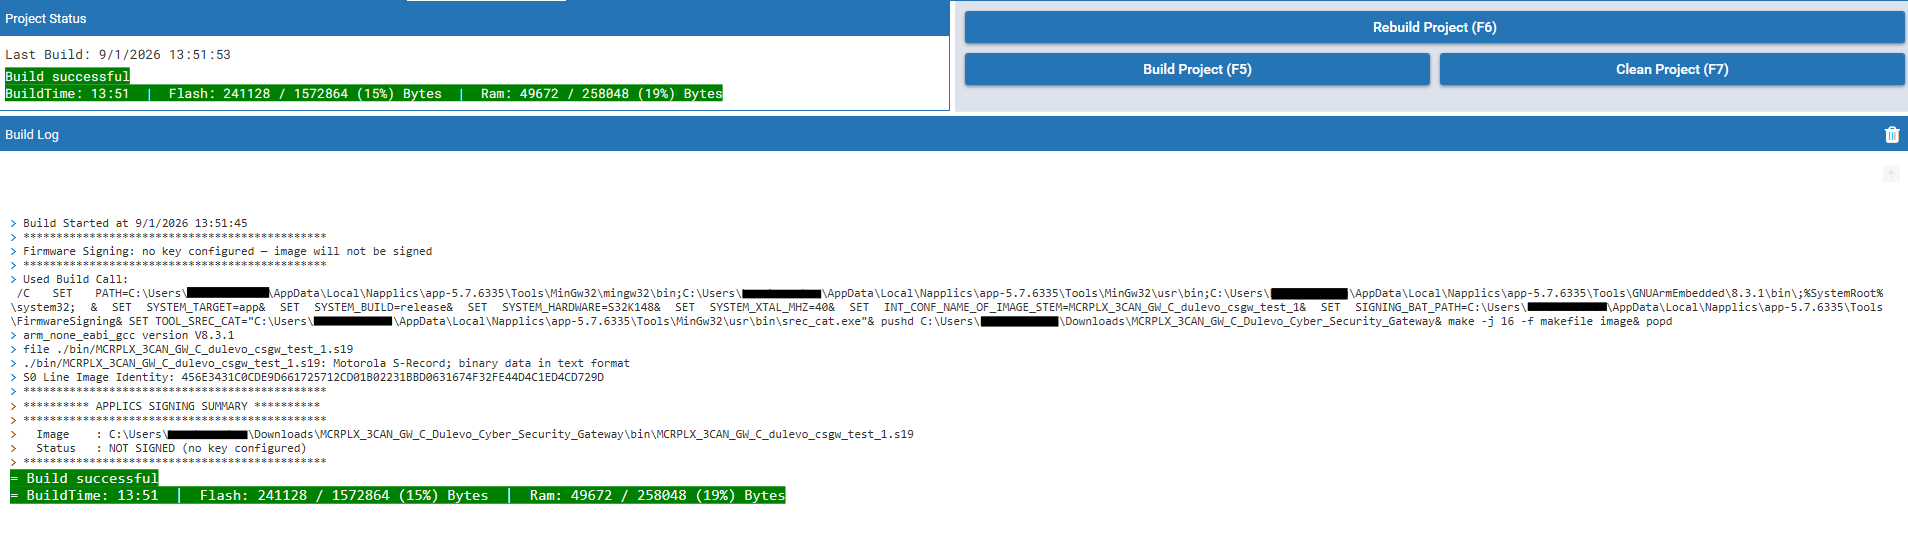
When there is no signing key, the build still works, but the log starts with Firmware Signing: no key configured and the summary ends with Status: NOT SIGNED (no key configured). A cybersecurity module will not start such an image.
Sign a Package Manually
Use this if you want to sign a .s19 that already exists, sign several files at once, or sign a package again with another key.
- Open the page with the button
Signin theSecuritygroup box of theProjectpage, or go to theS19 Information and Signingtab directly - Press
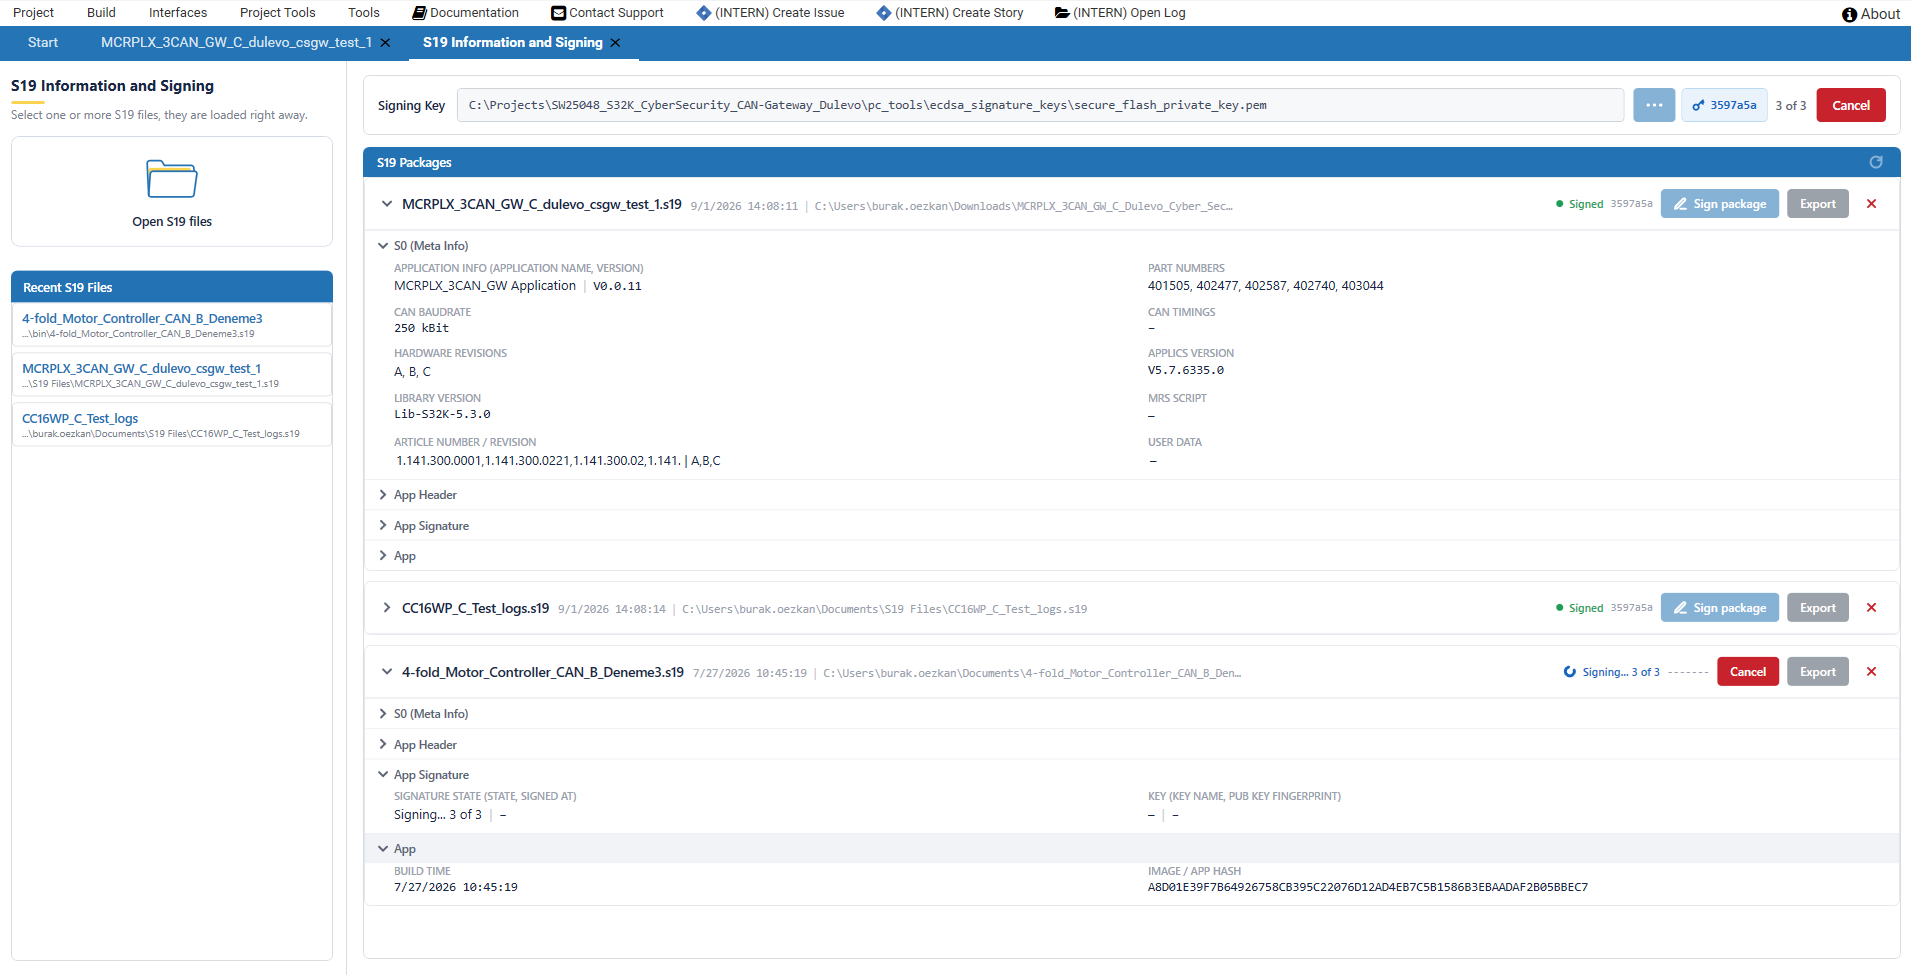
Open S19 filesand select one or more.s19files. You can select several files of a folder at once. The files are loaded directly and show up as packages on the right side. Files you used before are in theRecent S19 Fileslist - Check the
Signing Keyin the left panel. It comes from the project. To use another key, press the folder button and select another.pemprivate key. The short fingerprint of the key is shown next to it - Press
Sign packagefor one package, orSign all packagesfor the whole list - Check the state on the package card
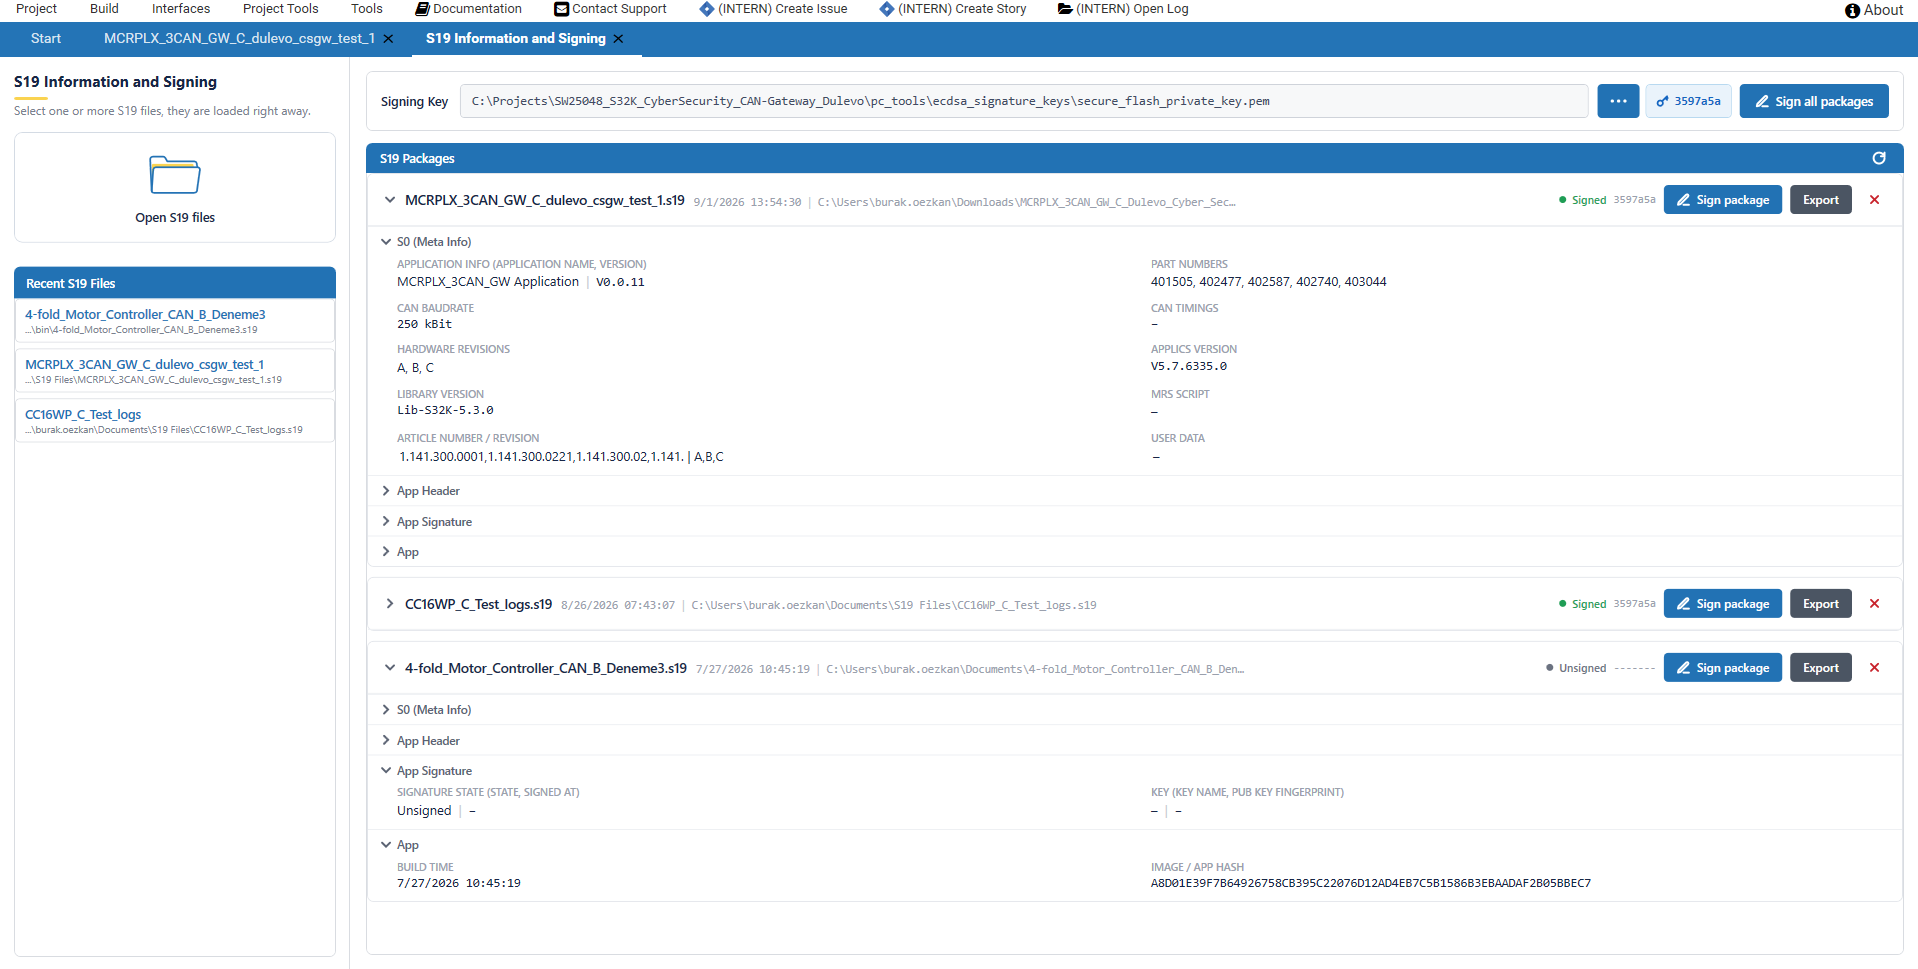
Sign all packages works through the list one after the other. While it runs you see the progress as 2 of 5, at the end the result as 3 succeeded, 2 failed. With Cancel you stop the running signing, the .s19 is then not changed. With Retry failed you sign the failed and cancelled packages again.
Signature State of a Package
| Badge | Meaning |
|---|---|
Signed |
Signed with the key that is selected now |
Signed with different key |
Signed, but with another key than the one selected now |
Unsigned |
No signature in the file |
Signing... |
Signing is running |
Failed or Cancelled |
See the text on the card and Troubleshooting |
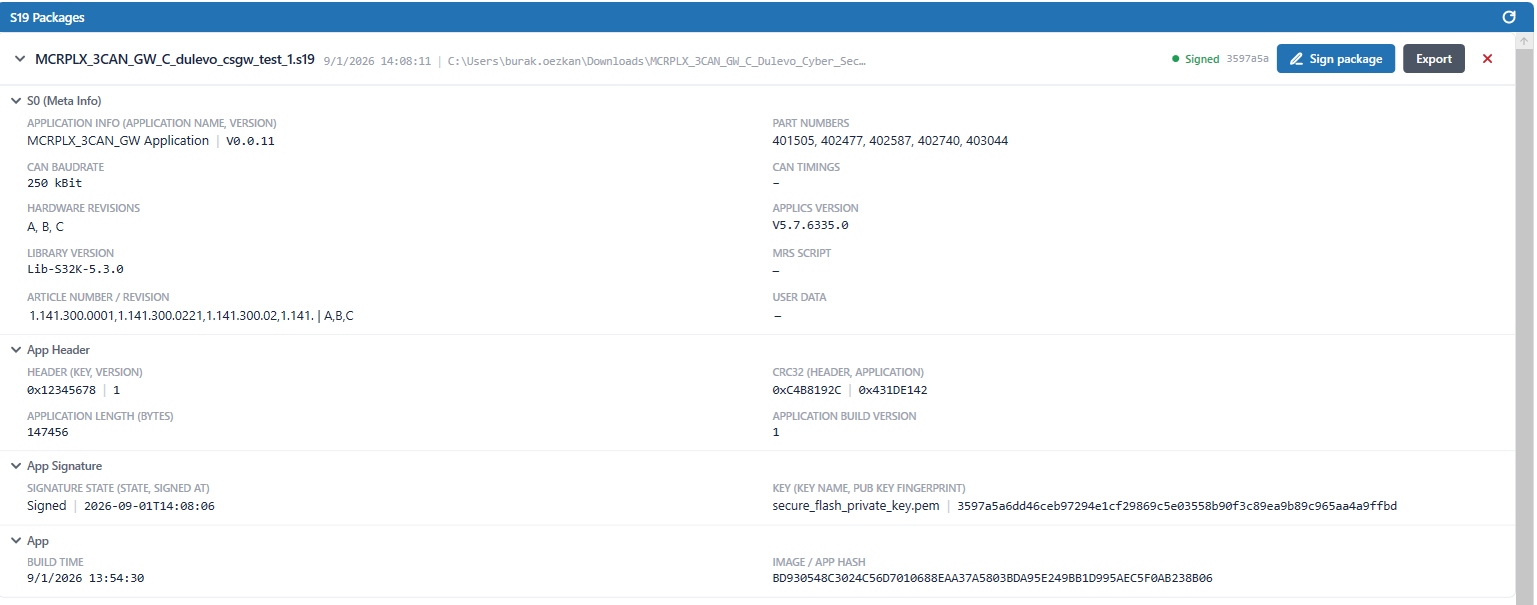
Open the card to see the details. In the group App Signature you find SIGNATURE STATE (STATE, SIGNED AT) and KEY (KEY NAME, PUB KEY FINGERPRINT). The other groups S0 (Meta Info), App Header and App show application name and version, part numbers, hardware revisions, CAN baudrate, the CRC32 values and the application length.
Signing writes into the same .s19 file. Close the file in all other programs, for example an editor or a flash tool, before you sign.
Export a Signed Package
- Press
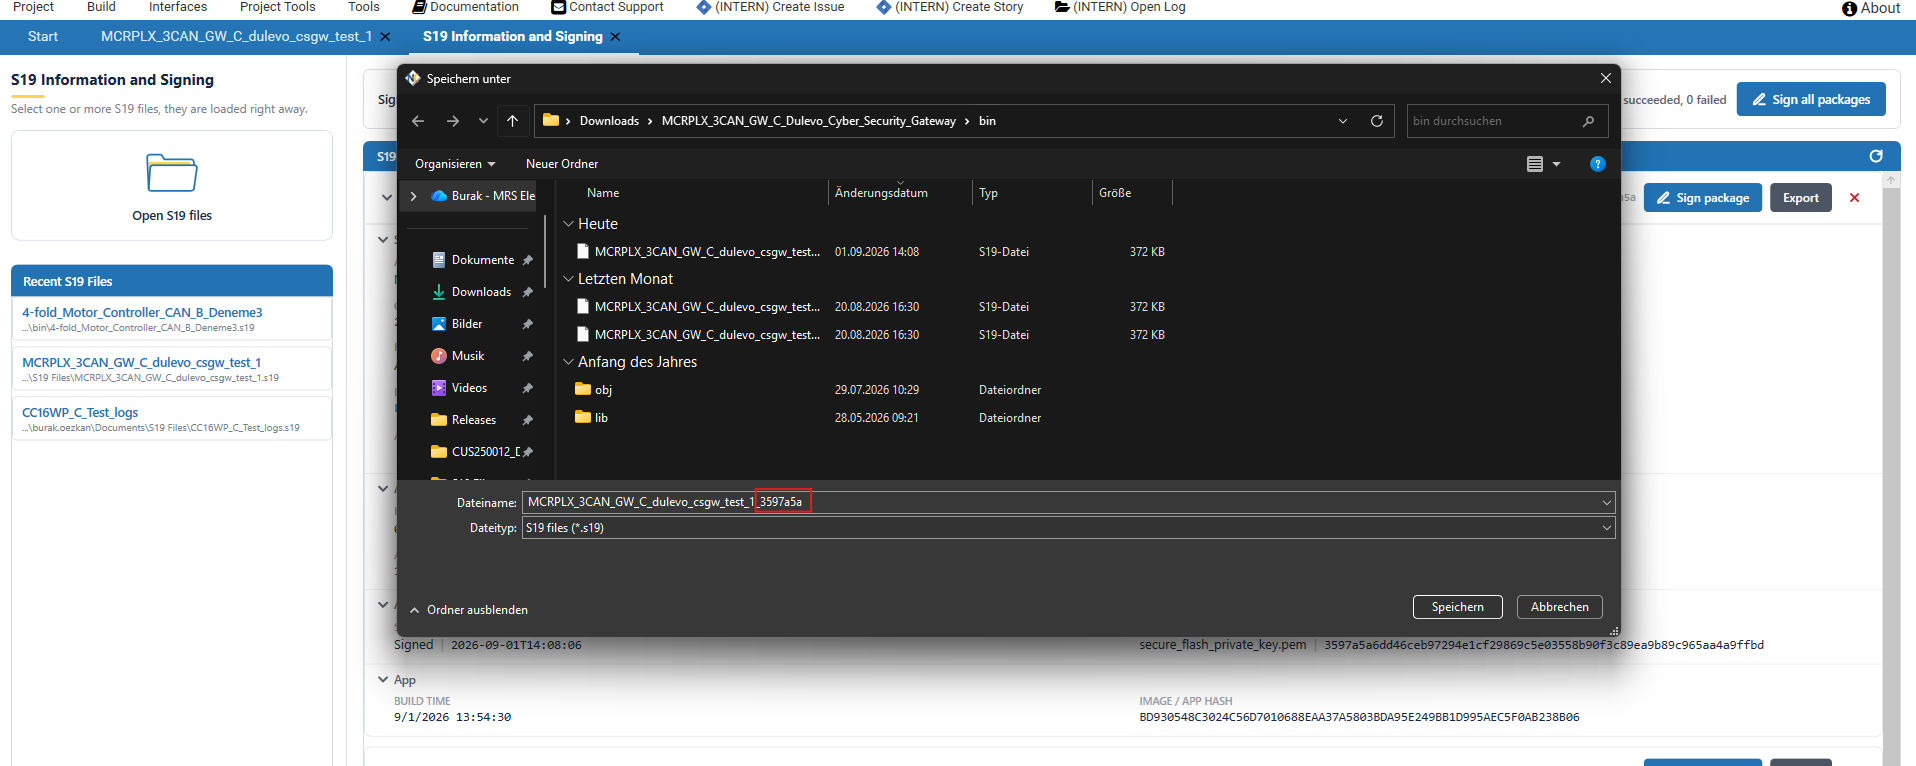
Exporton a signed package card - Select the file name and the folder. The suggested name has the short key fingerprint at the end, for example
firmware_3c59783.s19. So you can see the difference between two exports of the same image - Applics Studio writes the
.s19and a.jsonfile with the same name next to it
The .json file contains the S0 information, the app header values, the signature state, key name and fingerprint, the signing time and the Applics Studio version that exported it.
What Happens in the Background
You do not need this part for the daily work, but it helps if something does not work.
- The signature is an ECDSA signature on the NIST P-256 curve (
prime256v1) over the application binary - Applics Studio cuts the image to the application flash area, writes the build version into the application header, pads the image, creates the signature, calculates the CRC32 of the application and its length, writes signature, CRC and length into the application header and calculates the header CRC at the end
- The information about the signing is written into the
.s19as S0 records. S0 records are not flashed and are not part of the signature
| S0 Marker | Content |
|---|---|
MRS-SignatureStatus>>> |
Signed |
APPLICS_SIGNING_KEY_NAME: |
File name of the key |
APPLICS_SIGNING_KEY_HASH: |
SHA-256 fingerprint of the public key |
APPLICS_SIGNED_AT: |
Time of the signing in ISO-8601 |
The fingerprint in the user interface is the SHA-256 hash of the public key in SubjectPublicKeyInfo .der-Format. It is never a hash of the private key file. You get the same value with:
openssl pkey -in sw_signature_private_key.pem -pubout -outform DER | openssl dgst -sha256
So nothing of the private key is in the file, but you can still check which key pair was used.
Only ECDSA keys work. In the application header there is one byte for the signature length, an RSA signature does not fit in there.