Table of Contents
Eclipse Integration of Applics Studio Projects
The following describes how an Applics Studio project can be imported into Eclipse and how it can be build without Applics Studio. It assumes you use a recent version of Eclipse CDT. The general steps can also be applied to other IDEs.
Applics already provides the toolchain (consisting of make and gnu arm embedded) and prints out the build settings used. Additionally the file generation by Applics can be manually controlled by the user. So all that needs to be done is extract these paths and settings and using them in your IDE or build environment of choice:
- Import project
- Add build environment (generall located at
%LOCALAPPDATA%/ApplicsStudio/%APPLICS_VERSION%/Tools) - Add build settings (see
Used Build Callin the build log underBuild Information (F1)).
Project Import
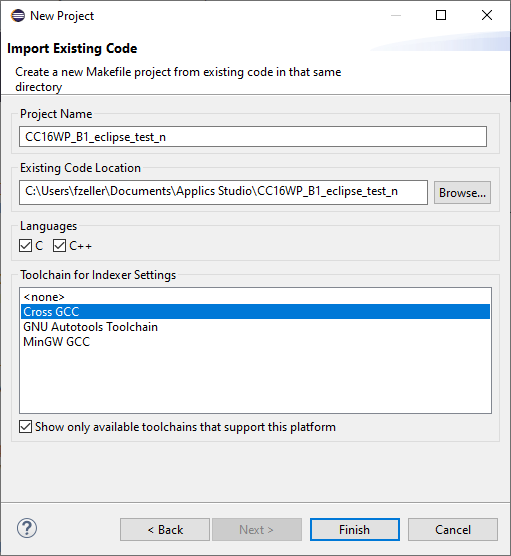
Import the Applics Studio project as a makefile project.
Add Environment Variables
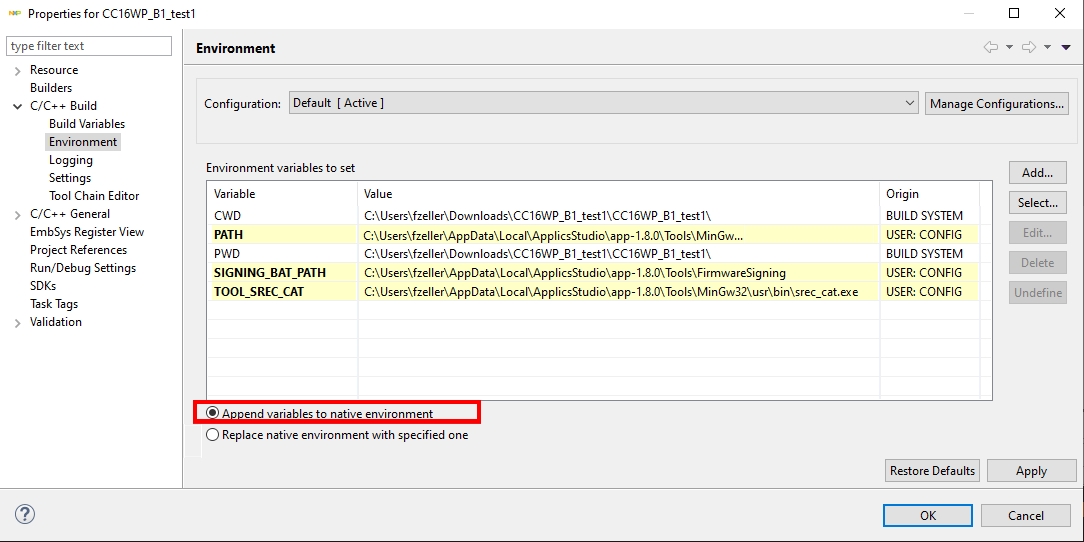
See the following snippets for the paths you need to set-up:
- Replace
<USERNAME>with your windows username. - Replace
<APPLICS VERSION>with the version of the used Applics Studio, e.g.app-2.2.1for Applics Studio Version 2.2.1.
PATH=C:\Users\<USERNAME>\AppData\Local\ApplicsStudio\<APPLICS VERSION>\Tools\MinGw32\mingw32\bin;C:\Users\<USERNAME>\AppData\Local\ApplicsStudio\<APPLICS VERSION>\Tools\MinGw32\mingw32\usr\bin;C:\Users\<USERNAME>\AppData\Local\ApplicsStudio\<APPLICS VERSION>\Tools\MinGw32\usr\bin;C:\Users\<USERNAME>\AppData\Local\ApplicsStudio\<APPLICS VERSION>\Tools\GNUArmEmbedded\8.3.1\arm-none-eabi\bin;C:\Users\<USERNAME>\AppData\Local\ApplicsStudio\<APPLICS VERSION>\Tools\GNUArmEmbedded\8.3.1\bin;

SIGNING_BAT_PATH=C:\Users\<USERNAME>\AppData\Local\ApplicsStudio\<APPLICS VERSION>\Tools\FirmwareSigning

TOOL_SREC_CAT=C:\Users\<USERNAME>\AppData\Local\ApplicsStudio\<APPLICS VERSION>\Tools\MinGw32\usr\bin\srec_cat.exe
If you prefer shell scripts please refer to the following script.
#!/bin/sh
USER_PROFILE=<USERNAME>
APPLICS_VERSION=app-2.2.1
APPLICS_DIR=/c/Users/$USER_PROFILE/AppData/Local/ApplicsStudio/$APPLICS_VERSION
#APPLICS_DIR=%LOCALAPPDATA%/ApplicsStudio/$APPLICS_VERSION  # unfortunately this doesn't work because of how the paths are formatted

GCC_PATH1=${APPLICS_DIR}/Tools/GNUArmEmbedded/arm-none-eabi/bin
GCC_PATH2=${APPLICS_DIR}/Tools/GNUArmEmbedded/bin
MINGW_PATH1=${APPLICS_DIR}/Tools/MinGw32/mingw32/bin
MINGW_PATH2=${APPLICS_DIR}/Tools/MinGw32/usr/bin
SIGNING_BAT_PATH=${APPLICS_DIR}/Tools/FirmwareSigning

# prepend toolchain and export other paths to prepare environment
export PATH=${MINGW_PATH1}:${MINGW_PATH2}:${GCC_PATH1}:${GCC_PATH2}:$PATH
export SIGNING_BAT_PATH

# open eclipse/your IDE/editor of choice from this environment
Add Build Settings
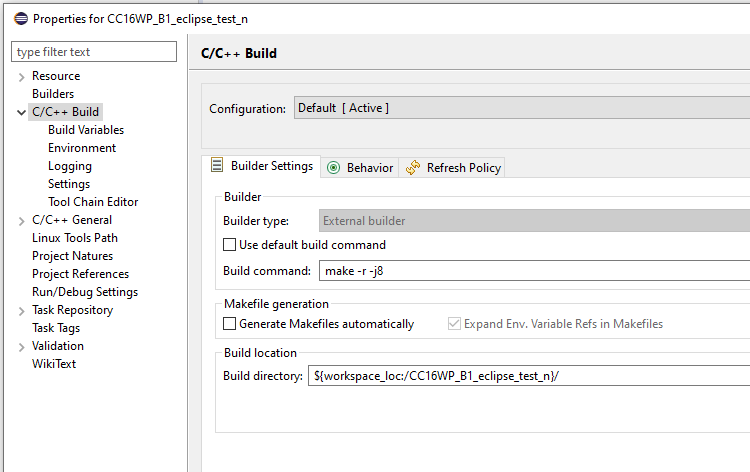
Whilst most build parameters are identical between products, some build parameters are specific to them (for Applics Version 1.8.0 and newer). You can get the parameters at Used Build Call in the build log in Applics (open Build Information (F1) and do a Build Project (F5)). Look for the SET SYSTEM_TARGET string as this and the following build environment variables are what we're looking for:
/C SET PATH=C:\Users\USERNAME\AppData\Local\ApplicsStudio\app-2.2.1\Tools\MinGw32\mingw32\bin;C:\Users\USERNAME\AppData\Local\ApplicsStudio\app-2.2.1\Tools\MinGw32\usr\bin;C:\Users\USERNAME\AppData\Local\ApplicsStudio\app-2.2.1\Tools\GNUArmEmbedded\8.3.1\bin\;%SystemRoot%\system32; & SET SYSTEM_TARGET=app& SET SYSTEM_BUILD=release& SET SYSTEM_HARDWARE=S32K144& SET SYSTEM_XTAL_MHZ=40& SET INT_CONF_NAME_OF_IMAGE_STEM=CC16WP_C_EclipseBuild& SET SIGNING_BAT_PATH=C:\Users\USERNAME\AppData\Local\ApplicsStudio\app-2.2.1\Tools\FirmwareSigning& SET TOOL_SREC_CAT=C:\Users\USERNAME\AppData\Local\ApplicsStudio\app-2.2.1\Tools\MinGw32\usr\bin\srec_cat.exe& pushd C:\Users\USERNAME\Documents\Applics Studio\CC16WP_C_EclipseBuild& make -j 12 -f makefile image& popd
So in our example it's: make image -j SYSTEM_TARGET=app SYSTEM_BUILD=release SYSTEM_HARDWARE=S32K144 SYSTEM_XTAL_MHZ=40
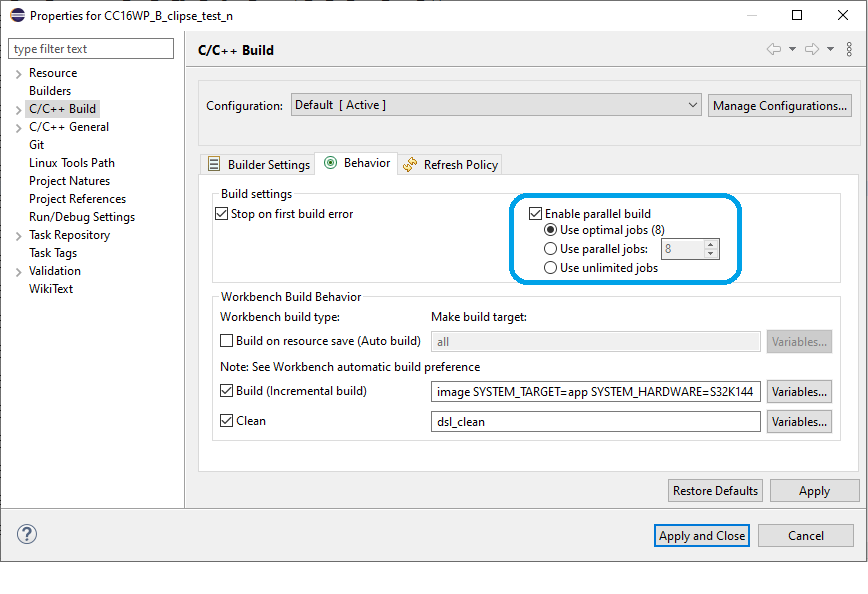


Build time can be increased by using a parallel build job
Build Project
Now everything is set up. You can now build projects independently of Applics. You will however need to use Applics e.g. to update to a new version or to e.g. change CAN DB entries and settings. This is because these files are best managed by Applics. Their generation can be controlled under Applics Auto Generated Files in the project overview. Eclipse provides two options:
-
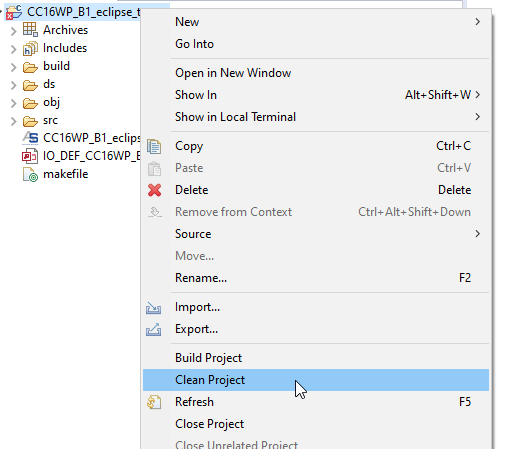
Clean Projectremoves all build files and binaries (libraries will not be deleted) -
Build Projectbuild the project
If you want to add files to the build please refer to the FAQ.
